- Home
- About
- Products
- Product Testing
- Application
- Services
- Information
- Contact
- All
- Product Name
- Product Keyword
- Product Model
- Product Summary
- Product Description
- Multi Field Search
Views: 4585 Author: Site Editor Publish Time: 2020-07-10 Origin: Site

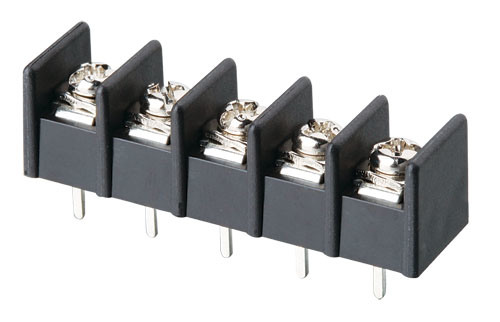
In the assembly of electronic products, the application of cable connectors is extremely extensive, and it is a key product to ensure the correctness and reliability of electrical signal transmission. There are many types of cable connectors, mainly divided into low frequency, high frequency, round and rectangular. In this article we will briefly introduce the cable connectors.
The connector of the cable is a device specially used for cable connection. The connector facilitates the internal connection of the photoelectric transmission device, ensures faster signal transmission, and ensures the stable transmission of information such as data, audio, and video. At the same time, the flame retardant material used in the connector jacket also makes it a higher safety factor. In addition, it is more convenient during use. The connector facilitates the connection of related equipment, makes the connection between various transmission equipment and the distribution frame easier and faster, and greatly reduces the loss rate in information transmission. Cable connectors are mainly used for signal transmission between various types of digital program-controlled switches, internal connections of optical transmission equipment and distribution frames, and are used to transmit data, audio, video and other communication equipment.
Tools required for inspection, including scales, allen wrenches, taps, plate files, hand saws, blades or electric knives, special metal shears, hammers, emery cloth, needle-nose pliers, nozzle pliers, wire cutters, screwdrivers, copper brushes, and special installation tools. The tools should be ready and intact.
1. Disassemble the connector and disassemble the detachable parts in sequence.
2. Fix the cable end, nail it on the shaft plate, and extend the end by 200mm-300mm. The end of the cable is inclined downward and makes an angle of about 30 ° -45 ° with the horizontal direction.
3. Peel off a section of about 45mm cable sheath with a hand saw or electrician's knife. The cross section must be kept straight.
4. Apply a sealant evenly on the joint between the sheath surface and the outer conductor, and then place the connector back cover, gasket, and seal ring on the cable in order. Install the connector sleeve on the outer conductor with the jacket removed, which is close to the end of the cable jacket.
5. Use a copper brush to remove the sheath powder and copper shavings remaining on the cable head.
6. Cut off the excess wrinkled copper tube outer conductor with special metal scissors about 2mm from the end of the connection sleeve. Use needle-nose pliers to flared the outer conductor of the wrinkled copper pipe outwards, and tap lightly with appropriate tools such as needle-nose pliers and hammers to make it flat against the end face of the outer casing. Note that the flanging needs to be uniform and round.
7. Use water pliers, files, abrasive cloth and other tools to remove sharp corners and smooth burrs.
8. For smooth copper tube inner conductor, use a hand saw to saw off the insulating tape and inner conductor protruding from the outer conductor. Use a file to flatten the end of the inner conductor copper tube, remove the corners, and tap to the depth that should be compatible with the length of the inner guide assembly. For the inner conductor of the wrinkled copper pipe, cut off the insulating tape protruding from the outer conductor with water pliers, and use special metal scissors to cut off appropriate length of the inner conductor.
9. Screw the inner conductor assembly onto the inner conductor copper tube. For the inner conductor of smooth copper pipe, it shall be tightened with wire cutters. For the inner conductor of a wrinkled copper tube, screw the thread connected to the inner conductor assembly to the inner conductor about 2mm, and tap the inner conductor gently with a suitable tool such as needle-nose pliers or hammer and flip the inner conductor assembly inward, making it wrapped in inner conductor.
10. Connect the inner conductor assembly, the inner and outer conductor fixing assemblies, the inner conductor assembly, and the outer casing in order, and tighten and install them securely.
11. Gather the seal ring, gasket, and rear end cover in order, tighten the rear end cover and the connection sleeve with a wrench, and wipe off the excess sealant.
12. Insert the plug into the inner conductor assembly.
13. Install the sealing ring and connector protective cover, and connect and fix it with connecting fasteners. Unscrew the protective cap of the inflatable mouth on the outer shell to inflate the cable. Fill it with dry air, and make the air pressure reach 0.05 MPa-0.2MPa. After 24 hours, the air pressure is maintained at more than 90% of the charged air pressure value.
All in all, cable connectors are very critical connecting devices. I hope you can learn about it briefly after reading. If you are interested, please click http://www.cnkefa.com/